Below is our Music Video:


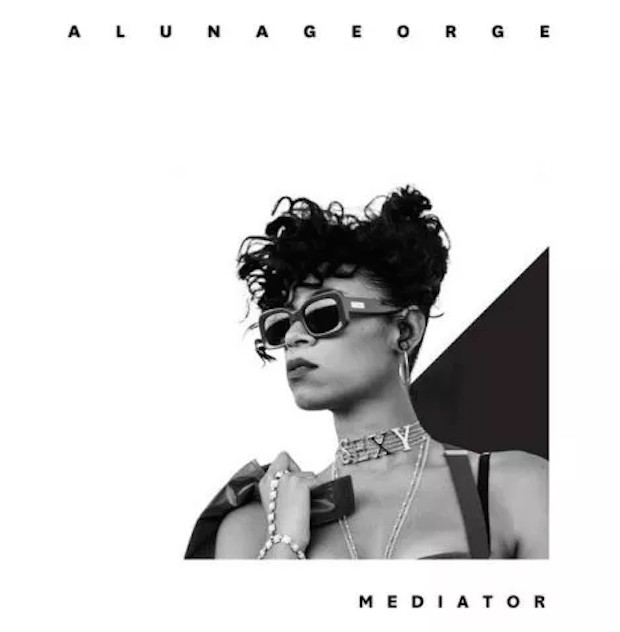
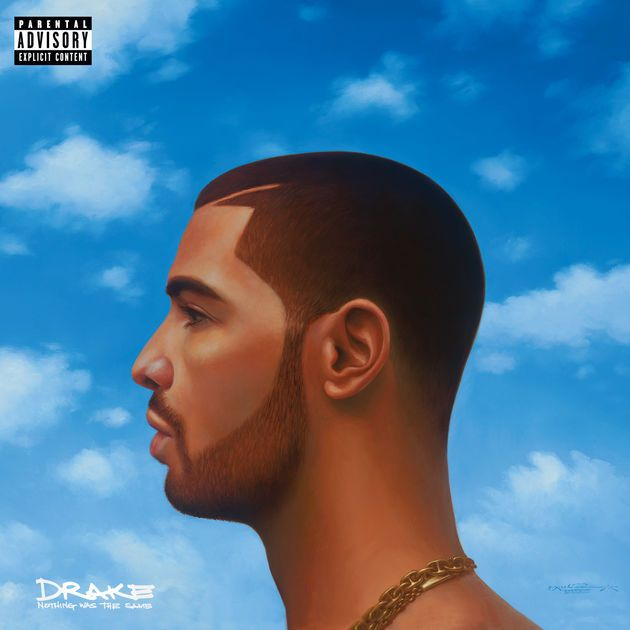
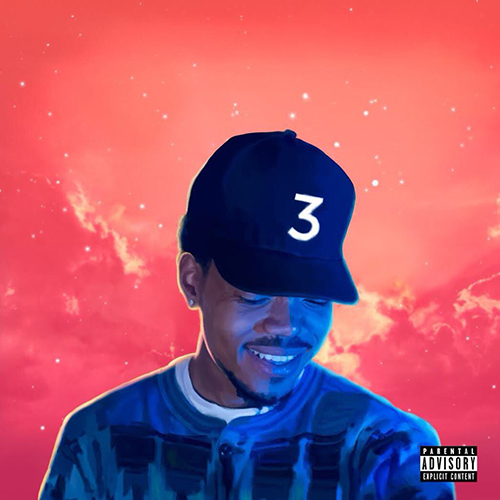
Below are the front panels of our digipak:

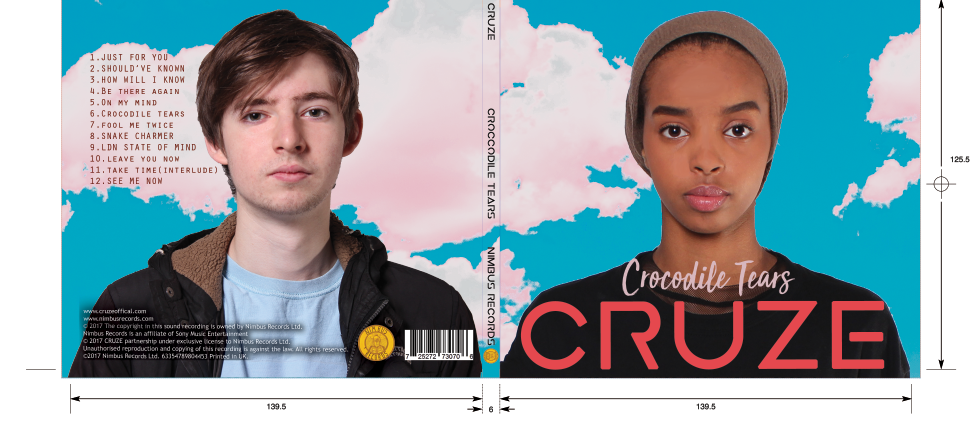
Below are the outside panels to our digipak.

Below are the outside panels to our digipak.

Below are the inside panels to our digipak.

Below are the inside panels to our digipak.

Click on the image below to access our website.

Thursday, 21 December 2017

Construction Post 2: Week 2 Production


What did we have to do:

1. Complete the 2nd location shoot
2. Complete the 2nd photoshoot

WOOD GREEN LOCATION SHOOT 

In production week 2 we had our second location shoot on a car park in Wood Green. The shoot was quite successful, we managed to get some of the shots we intended but there were many obstacles we had to overcome. These issues were:

  • The  camera battery was not completely charged when we set off so it was a rush to try and get the shots we wanted before the battery ran out.
  • As it took longer than expected to leave school and get to the location, it was very dark when we got to the car park and so lighting was an issue. However the night setting complimented the overall aesthetic of the video and we were resourceful with the lighting and got some good shots.
  • There were some members on the public that were curious in what we were filming and so watched us a lot, this put off some of our actors at first but they were able to get into role when these people left.


My contribution to the video shoot
  • I directed and filmed almost all of the shots as I was not in these location shots.
  • I helped to arrange some of the extras, this included making sure they knew what to wear and where to be at what time.
  • I provided some of the costumes for the shoot.

Digipak Photoshoot

The shoot was very successful as we were able to get a wide range of photos for our Digipak. To keep some continuity with our artists' image we shot this in Brick Lane as well. We were well equipped for the shoot with a tripod and DSLR camera.

It was a great shoot and the only major we faced was obstructions in the shot, this was often in the form of cars driving along the street that was between our camera and the subjects of the shots. This is exhibited in the shot below:


This just meant that we had to be patient and smart in order to make the most out of the time we had and to get a wide range of shot types that we wanted. We also decided to take photos in other locations were this wasn't a big issue.

My contribution to the photoshoot
  • I took all of the photos
  • I helped pick some of the costume.
  • I directed the actors
  • I also brought in my DSLR as a back up.

Construction Post 1: Week 1 Production

What did we have to do:

1. Complete of the first location shoot
2. Complete of the 1st photoshoot for our website

Brick Lane Location Shoot Overview

Our first production week was very successful. As we were shooting on location, we had to consider many factors such as weather, health and safety. We managed to get all of the shots we needed and were very impressed with all the variations of shots we needed to get. We managed to avoid any major issues due to our careful preparation and it was a very great day.

Here is a picture of the location that we shot in:


Reflection

In reflection it is clear that there were 2 main problems that we faced in Week 1 of Production. These problems are:

The characterisation of the extras was not fully complete
  • Before filming we had a brief conversation with the actors concerning the actors they had to play, this character was often carefree and fun. A more in depth explanation of the character would have been more useful as it would have made it easier for the actors to get into character and avoid having to re-shoot our shots as our actors were not able to adhere to their roles and ended up laughing or getting out of character in these shots. This meant that we had to constantly take multiple clips of the same shot as many mistakes were made. To overcome this solution, I would give out instructions whilst the camera was rolling telling each individual what to do so that it looked more natural, authentic and professional. We also gave our extras 3 moves that they use if they felt as though they had nothing else to do, this helped to keep up the atmosphere that we were trying to cultivate proving to be a useful technique.
Getting our extras to Brick Lane
  • We intended 5 extras to come in but in the end only 4 could make it. This meant we needed to be resourceful and work out our shots with one less person. We did not let this ruin our day and we pressed on and created the illusion of a large group by having everyone close together.

Friday, 10 November 2017

R+P Post 33: Reflections on my role and contribution during Research and Planning

Overall, I feel very confident about what our group has accomplished in the research and planning stages of the process and I feel that we are well equipped to progress with the process. I've enjoyed the process thus far.

Here is what I have contributed to the research and planning so far:

Planning the video
  • I contributed various tracks when we were deciding on what song to go for, including the song that we are using now.
  • I thought of and drew some of the shots for our storyboard and timeline.
  • I helped with casting and getting the costume for the video. 
  • Aisha and I made and edited the screen test.
  • Edited some of the rough cut.
Planning the website/ album cover:
  • Researched examples and presented ideas for both website and album cover. Such as:
During test shoot:
  • Considering I was not in any of the test shots I did the bulk of the filming and some of the lighting work.
  • I helped to arrange costume.
  • Tested out our shot ideas such as the siren shots.
gifs website

Overall I believe that we all contributed an equal amount to the project and worked well as a team. I am looking forward to the stages to come.

R+P Post 32: Test shoot and rough edit

The test shoot was a very important part of the planning process as we were able to bring our ideas to life and see how they worked individually and how they worked together to make an effective music video. Here is our test video:


Here is the test shoot schedule that we used, we wrote down the various set ups and shots we needed to get.


A key aspect we were testing out in our test shoot was the various lighting set ups and the projector set up. Testing it before hand is very useful as it meas we can know what will and wont work when making the real video and it will also be much easier when we make the real video.


We also needed to test the handheld camera shots as we thought the aesthetic we could achieve from handheld shots would suit what we were going for.

Still of handheld DJ shots
The test shoot and the rough edit were both very useful as it allowed us to see how our ideas worked together and it highlighted the main issues that we may have faced later. Some of the issues we faced are:
  • Projections- we had to ensure we used a good quality projector and image as lower quality videos would flicker when on camera.
  • Handheld camera- the closer I got when filming the more prevalent the shadow.
  • Lighting- sometimes when we used darker colours for the lighting, the subjects in the video wouldn't be visible. 

R+P Post 30 & 31: My shoot-board/ call sheet


This document doubled as our shootboard and call sheet for our  studio test week. It neatly laid out all of the shots and setups that we wanted to get and allocated a time to achieve said shot. We also were able to allocate time to try variations of the shots and see what worked well. It was a call sheet as we put in when everyone was available and would be in the studio, this made it easy to plan what we could do as we would know who would be available to do a certain type of shot. Also when we were there by ourselves we would be able to setup for shots in the future.

Overall we all found this document very useful as we could easily plan out what we would do and when we do it. Also it meant that we could easily communicate with the teachers and technicians our availability, when we would be using the studio and what we planned to do.

R+P Post 29: Rehearsals

In order to ensure that we were ready to make a professional looking music video we had rehearsals to practice our performance.

Although I was not going to be lip syncing in the video, it was still important to us as a group to properly research lip syncing to gain tips and insight that would help us make a better media product. Below is a video we used to research the are of lip sync:


We used rehearsals to plan out the types of shots we wanted to get and the intricacies we wanted to capture in each shot to further enhance the quality of the video.

Below is a behind the scenes still from one of our rehearsals.


Although I was not acting in this section of the video, I felt the rehearsal was very useful as it gave me an opportunity to rehearse the various shot types and camera movements and allowed us to make creative decisions whilst also being able to test the final outcome. The rehearsals also allowed us to test out costume and props and see if they fit with the general aesthetic of the video.

R+P Post 28: My kit list

For our shoots we had 2 different sets of kit for the studio and for shoots on location.


This is the kit that we used on location:
  • Canon Legria HFG30 Camera
  • Libec TH-650HD Tripod
  • Canon DM-100 Microphone
  • Sennheiser Headphones
  • 64 GB SD card
  • Two batteries
  • Clapperboard
  • Whiteboard Pen and Wipe

This is the kit we used in the studio:

  • Canon 5D MK 2 Camera
  • 650 ARRI Turret Lights
  • ARRI Studio Lights
  • Projector
  • Cyclorama
  • Monitor
  • Samsung TV
  • Shoulder support rig for hand held sots
  • Lighting and Sound desk


During our test shoot we were briefed on all of the equipment and taught how to use it effectively and safely, we were also taught to safely pack and unpack all of the equipment. I really enjoyed using the equipment in the studio as the quality achieved through it is of a great satandard.